If you’re reading this, chances are you work with indoor fiber optic cables—whether you’re a facility manager, an IT tech, or someone who’s stared at a dead wall jack at 2 a.m. wondering how you’re gonna fix it before staff show up for work. As someone who’s spent the last decade selling and supporting indoor fiber optic solutions, I’ve seen every kind of cable fail: a cable pulled too tight during a server room upgrade, a pet chewed through a line behind a desk, even a construction worker nicking a run above a drop ceiling. Indoor fiber isn’t like the outdoor stuff—it’s tucked in walls, under floors, coiled around cable trays, so repairs need to be precise, clean, and fast, no room for extra downtime. Let’s walk through how to fix it right, using the tools and techniques I’d recommend to anyone working with our cables. Indoor Fiber Optic
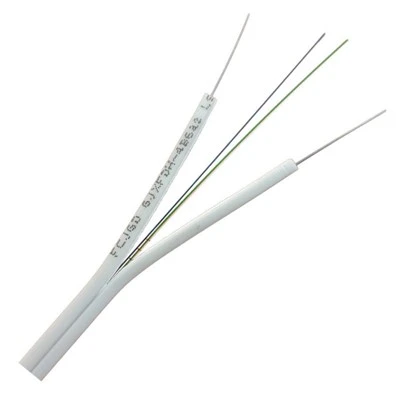
First, let’s start with the basics: what indoor fiber is, because repairing it depends on what kind you have. Unlike outdoor fiber that’s armored for weather, indoor fiber is usually tight-buffered—meaning the tiny glass core is wrapped in a soft plastic buffer, then a jacket that’s often riser-rated (for hallways) or plenum-rated (for air-handling spaces, which is the stuff we mostly supply for offices, hospitals, schools). If you cut a plenum jacket, it needs to be replaced with the same type—you can’t swap a riser cable in a plenum space, it’s a fire code no-no. That’s the first rule: match the cable type for any repair. Grab a section of the old jacket and cross-reference it with the cable number marked along the length, or check the label on the spool it came from. If you don’t have that, and you’re working in a plenum, don’t cut corners—use plenum-rated fiber for the repair. Code compliance matters here; one wrong choice and you could end up with fines or a dangerous fire hazard.
Next, you need the right tools. I’ve seen techs grab a cheap utility knife and a pair of scissors and make a mess. For indoor fiber repair, the essentials are: a fiber stripper (not a razor blade—razors nick the buffer or core), a cleaver (to cut the glass end perfectly straight, no angles), a fusion splicer (this is the only way to get a reliable joint for single-mode or multi-mode indoor fiber—crimp-on connectors work but they’re less durable for permanent indoor runs), fiber optic test equipment (a light source and power meter, or a OTDR if you have one—never skip testing), and a heat shrink splice protector. Also, get a pair of safety glasses—glass shards fly, even when you don’t expect them, especially when stripping the buffer. If you’re working in a drop ceiling, wear kneepads too; those metal grids are brutal on knees after an hour.
Let’s get to the step-by-step repair. First, locate the break. If you can’t see it (like a hidden run in a wall), use an OTDR to map the cable length and find the exact split—this is way faster than pulling the whole cable. Mark the break with a piece of tape where you’ll access it. If it’s behind a wall or in a cable tray, cut a small access point—don’t yank the entire cable out, that’s a waste of time and risks more damage. Once you have the broken sections separated, cut off the damaged ends. Use a utility knife to score the jacket, then gently peel it back in sections—don’t pull hard, that’ll stretch the buffer and damage the core inside. You should see two or three colored buffer tubes (for multi-mode) or a single clear tube (for single-mode) when you get past the jacket.
Now, strip the buffer. This is the most important step, because if you nick the glass core here, the joint will fail. Insert the end of the fiber into the fiber stripper, adjust the settings to match the buffer size (they’re color-coded for standard indoor fibers), and squeeze gently. Rotate the stripper around the buffer once, then pull— the buffer will slide off clean, no nicks. Do this for both broken ends. Next, you need to strip the tiny coating that’s on the glass core. This is even more delicate—use a separate coating stripper, or a lint-free cloth dipped in isopropyl alcohol (99% is best, not the 70% stuff) to wipe the coating off. Never use your fingers to rub it off, oil from your hands will contaminate the core and ruin the splice. After stripping, wipe each core with a clean alcohol wipe, then dry with a lint-free cloth—no dust, no smudges.
Now, cleave the core. This is where a lot of new techs mess up. The cleaver has a small blade that scores the core, then snaps it at a perfect 90-degree angle. If the angle is even a little off, the fusion splice will have high loss, which means weak signal. Take your time—set the cleaver on a flat surface, place the core in the v-groove, close the lid gently, and press down to score. Then lift the small lever to snap the core. When you lift it, you should see a perfect flat end, not a jagged one. If it’s jagged, you messed up the cleave, and you have to cut that section off and try again. No rushing here; a bad cleave means a bad splice, which means you’ll be back in the same spot in a week.
Once both ends are cleaved, place them in the fusion splicer. Open the clamp, put one core in each v-groove, close the clamp, and run the splice program. The splicer will align the cores (it’s automatic now, so you don’t have to do it by eye, which is good because the cores are smaller than a human hair) and melt them together with a tiny arc of electricity. The splicer will give you a loss reading—anything under 0.1 dB is good for single-mode, under 0.3 dB for multi-mode. If it’s higher than that, you’ll have to re-cleave the cores and try again. I always do at least two splices for a permanent indoor repair, just to be safe.
After the splice is done, slide the heat shrink splice protector over the joint, then use the heat gun to shrink it down. The heat will melt the plastic, covering the splice and protecting it from dust, moisture, and any future pulls. This is critical for indoor runs that might be bumped or have other cables dragged past them. Once the protector is cool, test the joint. Plug one end of the cable into a light source, and the other into a power meter. If the signal reads correctly, you’re good. If not, you’ll need to check the cleave, the splice, and test again.
Wait a second—what if the cable is too short? If the break is in a spot where there’s not enough slack to reach both ends, you’ll need to splice in a new section of indoor fiber. Make sure the new section is the same type as the original—same rating (riser/plenum), same count of cores, same mode (single/multi). That’s non-negotiable. Mismatched cores will cause signal loss, and mismatched ratings could be a fire hazard.
Now, let’s talk about common mistakes I see people make all the time. First, using outdoor fiber for indoor repairs—outdoor fiber is often not rated for plenum spaces, and its thicker jacket is hard to fit in tight indoor routes. Second, not testing the splice. I’ve seen techs walk away from a repair that looks good, only to find out the signal is weak three days later, because the splice had a hidden air gap. Third, using cheap tools. A $20 cleaver will give you bad cleaves every time; invest in good tools—they last, and they save you time in the long run. Fourth, not following fire codes. If you’re working in a commercial building, OSHA and fire marshal rules apply. Using non-plenum jacket in a plenum space is a quick way to get fined, and it’s dangerous in a fire—plenum cables are made to not release toxic fumes when burned, which can save lives.
As an indoor fiber optic supplier, I’ve got one last tip for you: keep spare sections of our plenum and riser-rated indoor fiber on hand, along with spare splice protectors and cleaning wipes. When you have a repair to do, you don’t want to run to the store and wait an hour for supplies. A little prep saves a lot of downtime, which is what keeps businesses running smoothly.

If you’re tackling a larger indoor fiber project, or you need help sourcing the right materials for repairs, don’t hesitate to reach out to our team for guidance. We’re here to make sure your indoor fiber runs are reliable, code-compliant, and easy to repair when issues pop up. We work with small businesses, big hospitals, schools, and every type of facility that relies on fiber, so we know exactly what you need to get the job done right.
GJFJV References:
- Indoor Fiber Optic Cable Installation and Repair Guidelines. Fiber Optic Association, 2022.
- National Electrical Code (NEC) Article 725: Communications Circuits, 2023 Edition.
- Fusion Splicing Best Practices for Tight-Buffered Indoor Fiber. Corning Optical Communications, 2021.
- Fiber Optic Safety and Compliance Manual. International Electrotechnical Commission (IEC), 2020.
Guangdong Shengtang Optical Cable Communication Equipment Co., Ltd.
As one of the most professional indoor fiber optic manufacturers and suppliers in China, we’re featured by quality products and good price. Please rest assured to buy bulk durable indoor fiber optic in stock here from our factory. Customized orders are welcome.
Address: The 6th floor of Building B3, located on the south side of Jingyi Road, Shiwan Town, Boluo County, Huizhou City, Guangdong Province.
E-mail: gdshengtang@gmail.com
WebSite: https://www.gdstcable.com/
